Published Mai 2021
When you're working in IT the keyboard is the thing you spend most of your time with. Having one of your very own, that you built and customized for your personal needs, feels natural. Additionally it's a cool project involving electronics, programming and CAD design and makes for a great occupation during Covid times.
Who knows how many keyboards are out there?! A BIG number... So which type do you want to go for? A coworker raised the question on our random Slack channel and mentioned a couple of ergonomic keyboards, amongst them there was the Dactyl-Manuform (See my old blog post for all details). It's an open-source project of an ergonomic split keyboard. I liked the design and the open source approach and read good things about it. So I decided to go for that. In retrospect that decision was taken a bit eagerly, I should have tested it out further before settling on one, because let me assure you that ergonomic split keyboards are a BIG change compared to what you're used to.
I thought I would get the hang of it and that with time I‘d just get used to it, but I did not. It ended up collecting dust while I continued using my Mac Magic Keyboard. The main drawback was that the curvature did not really fit my hands, I kept pressing next to the keys with my pinky fingers and also the front to back curvature seemed weird. Now those are all things you can change in an open source keyboard, but I didn‘t feel like going through several iterations to find all the right parameters.
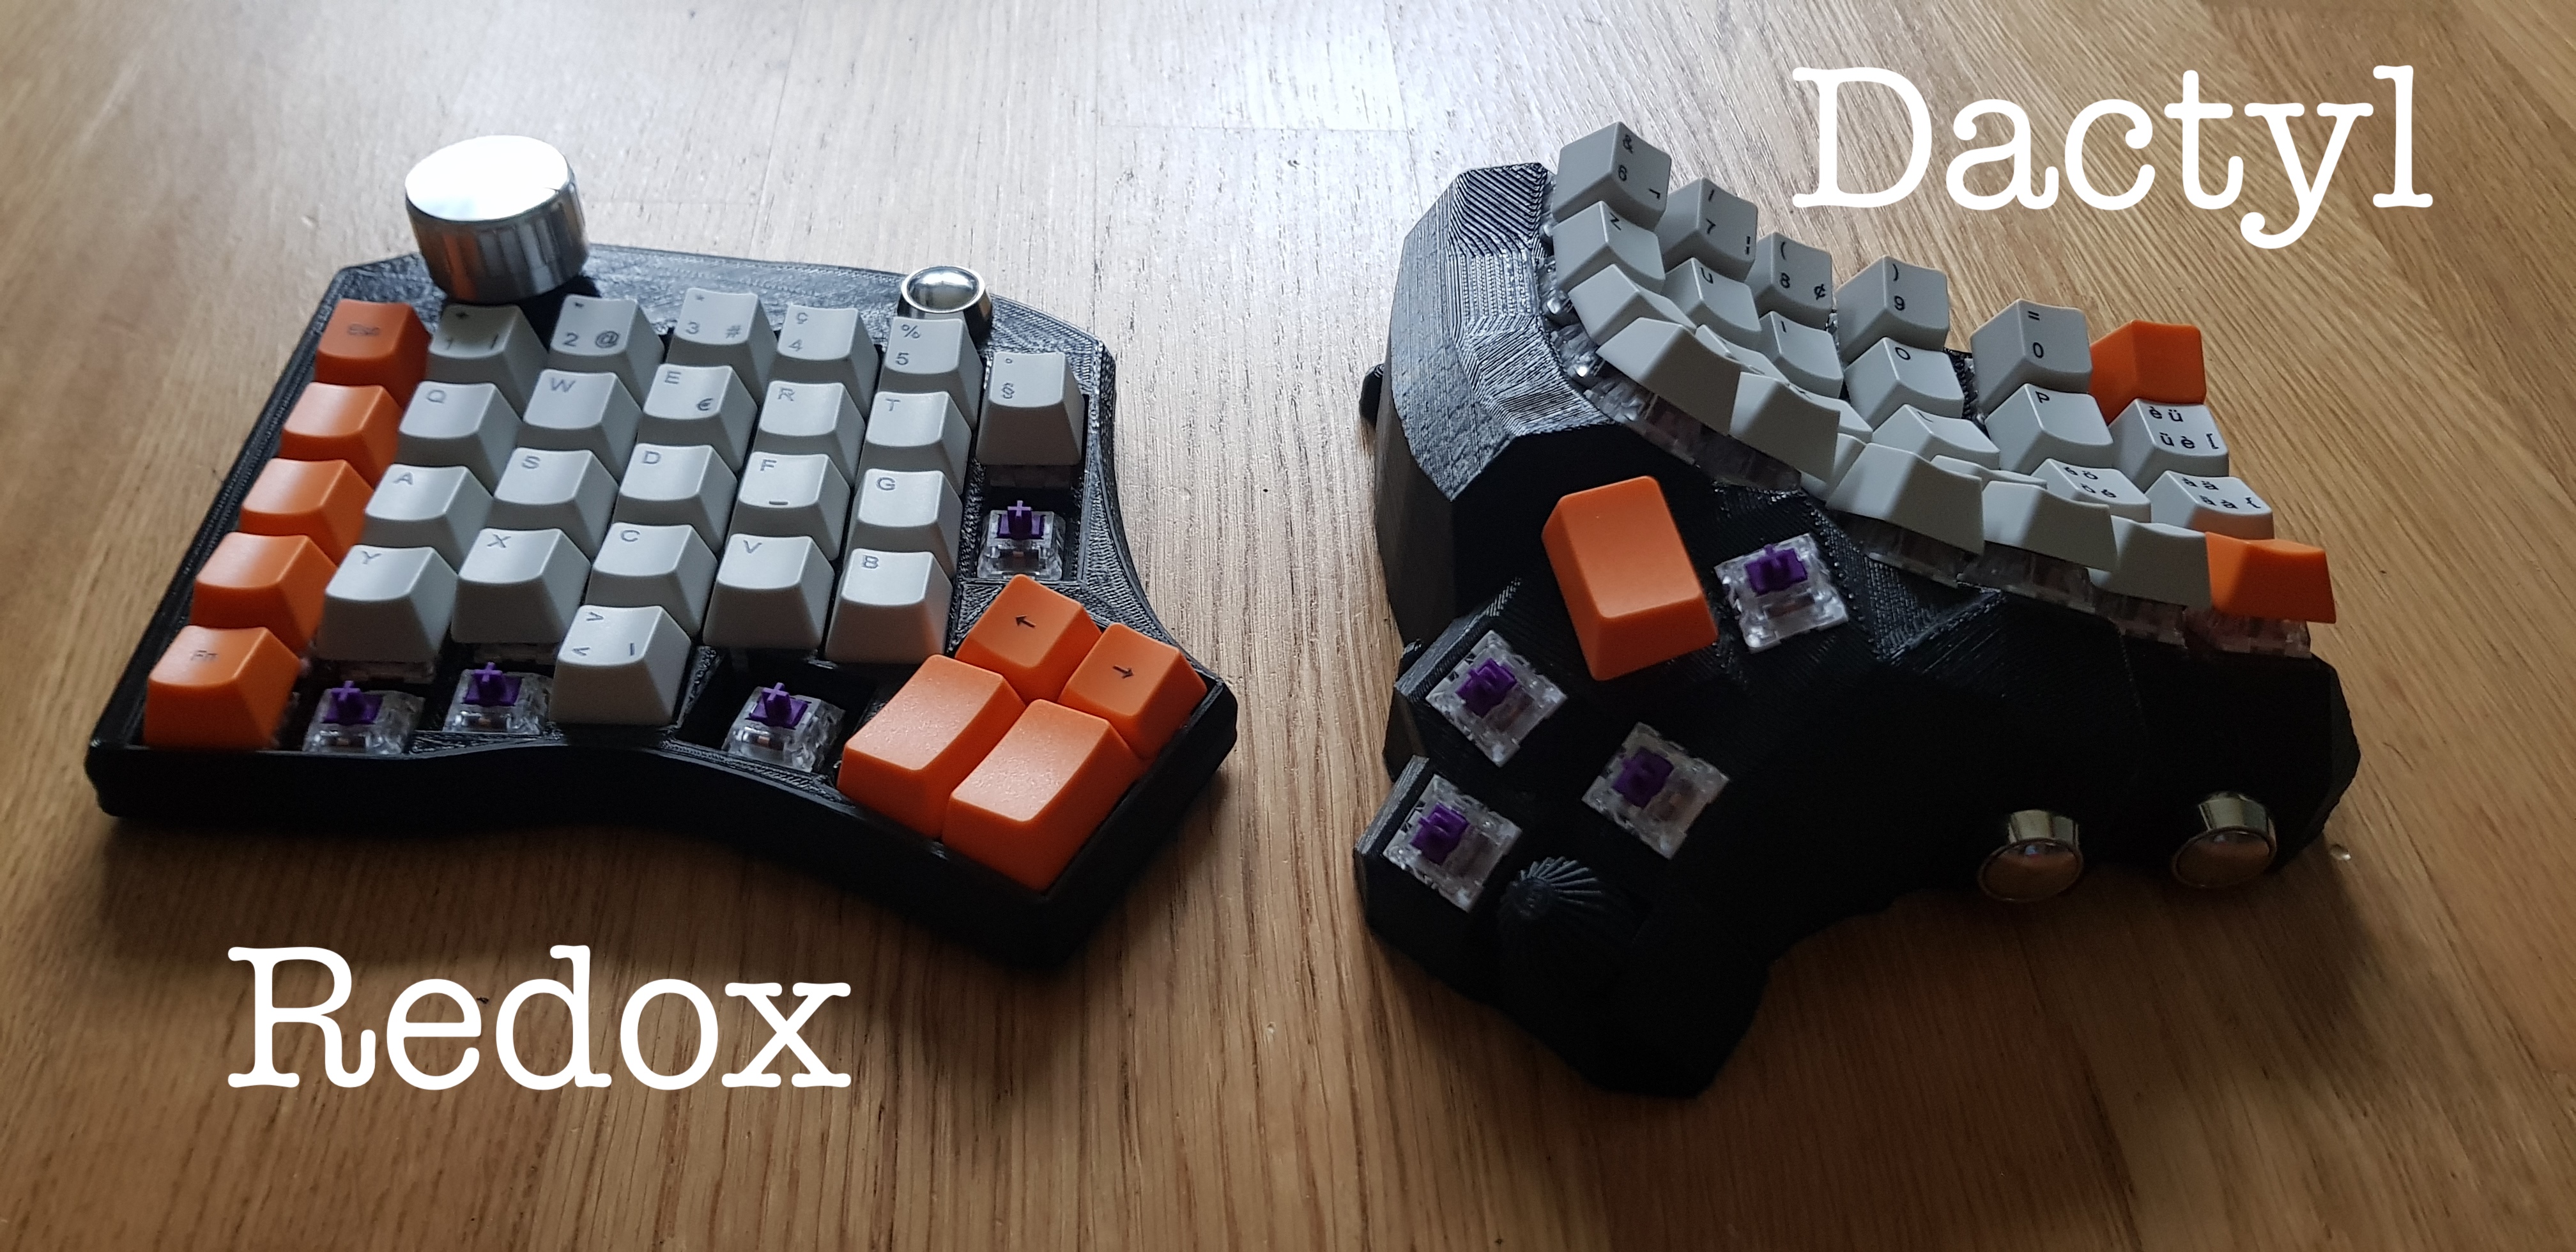
Comparing the Redox (preferred) and the Dactyl (first try) keyboards
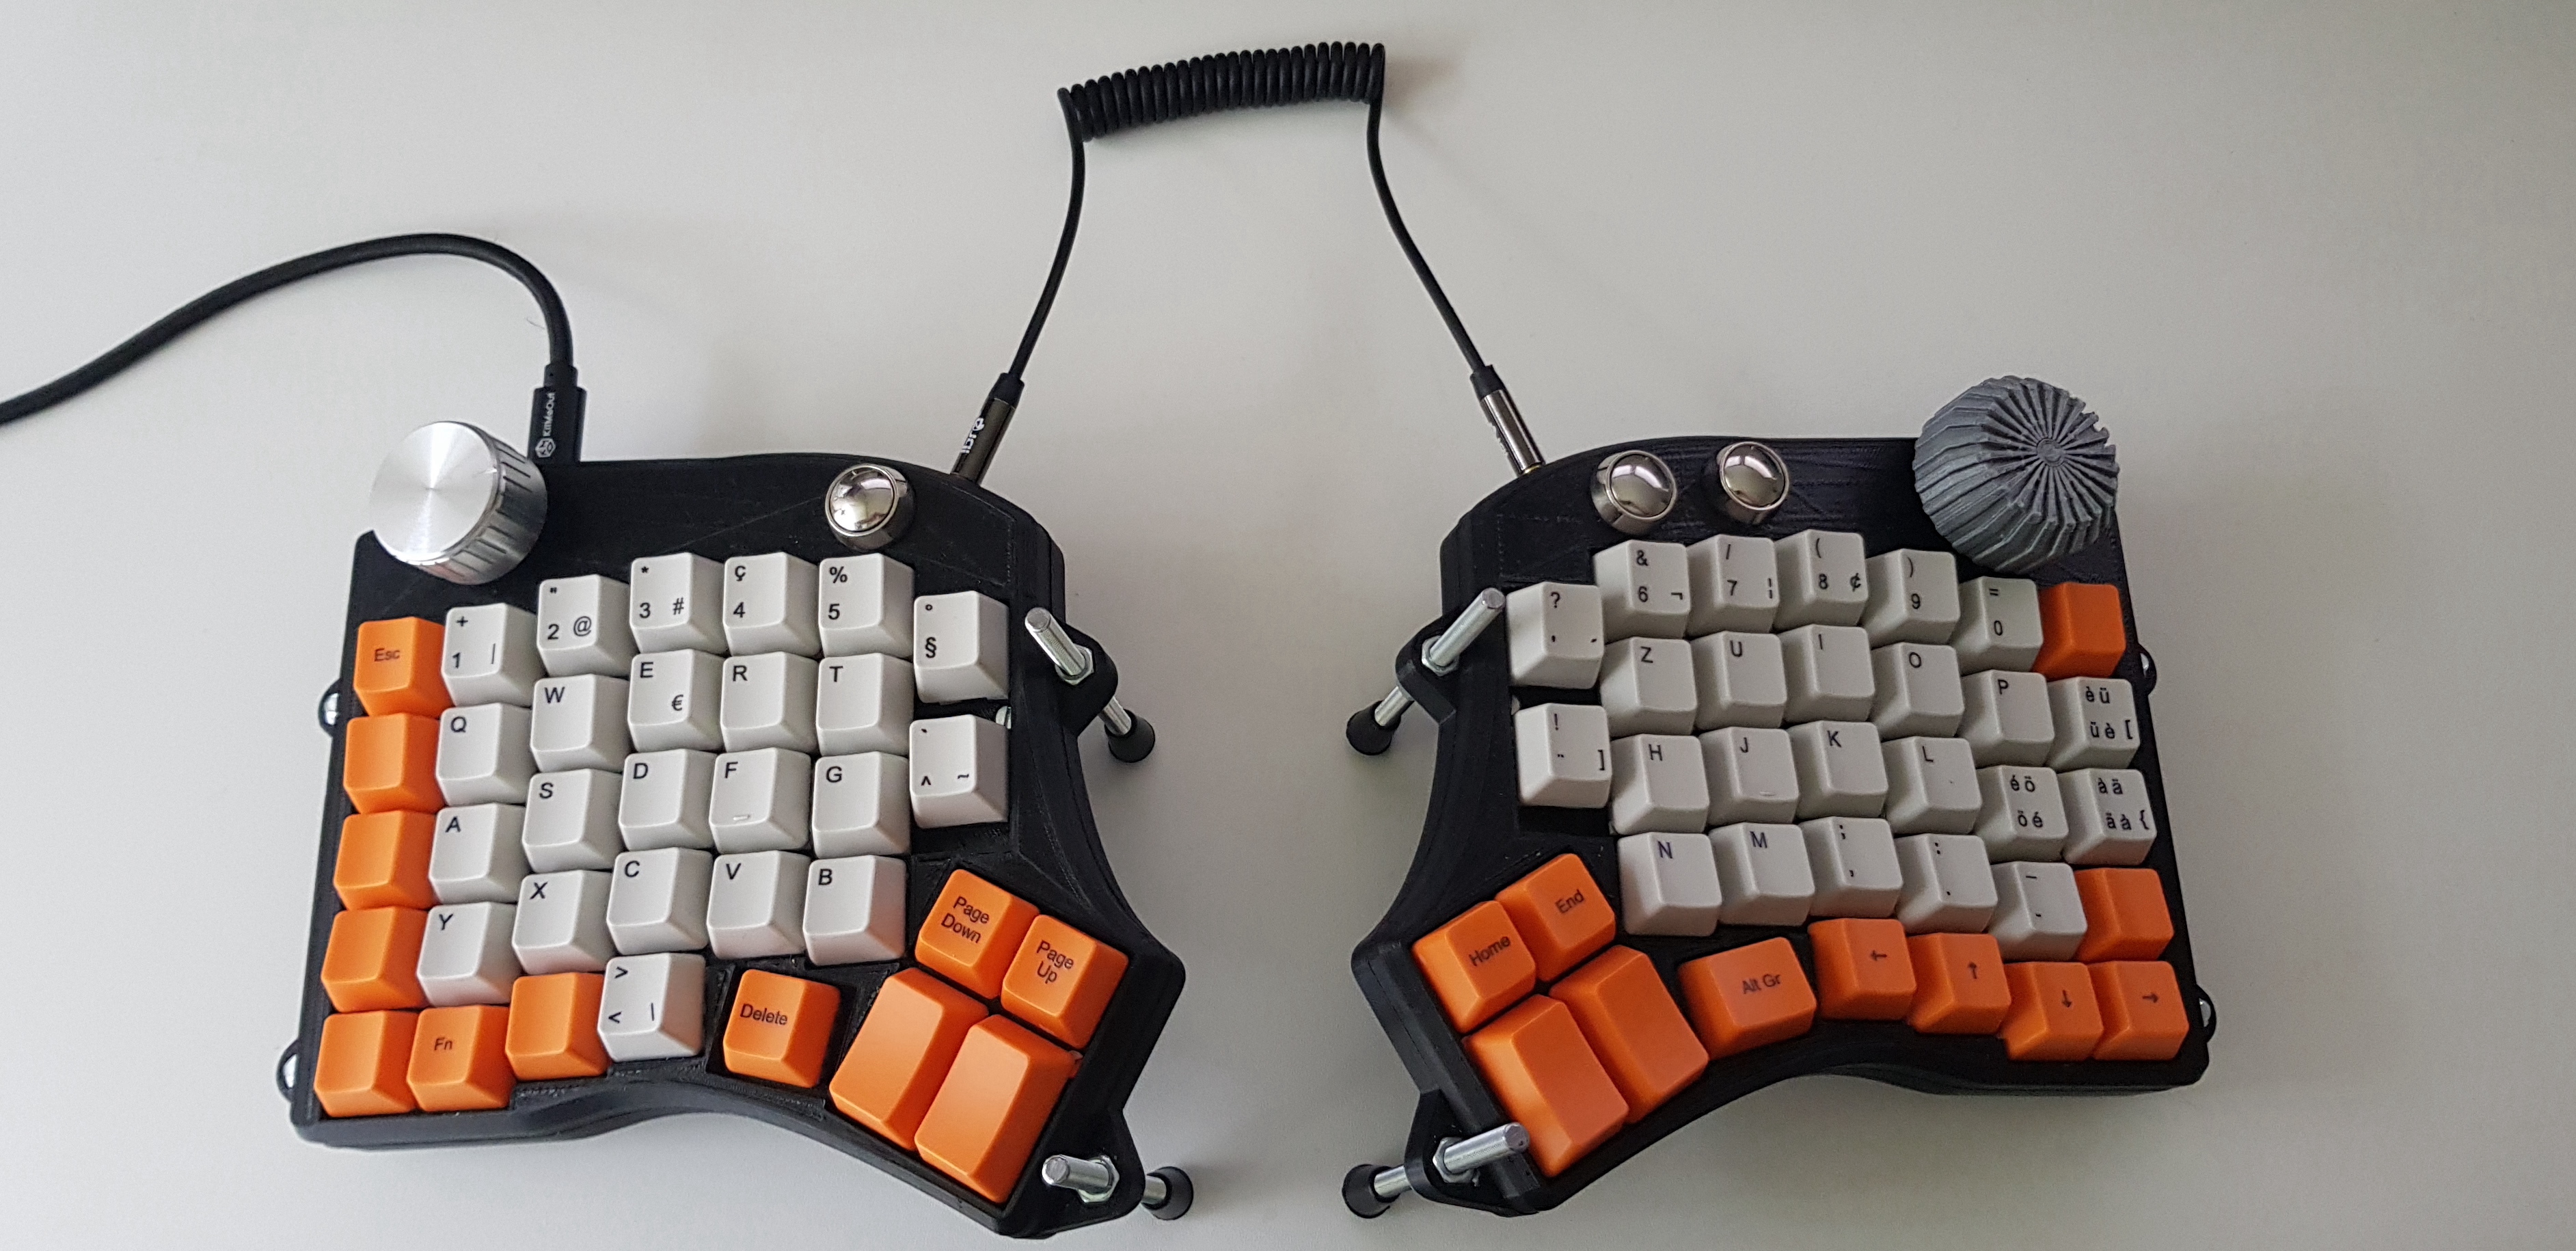
The Redox is an ergonomic split keyboard, meaning there are two sides (each with its own microcontroller) which are connected via a cable. I prefer to have media and some mouse control on my keyboard, so I modified it to accommodate media keys, a volume knob and a scroll wheel.
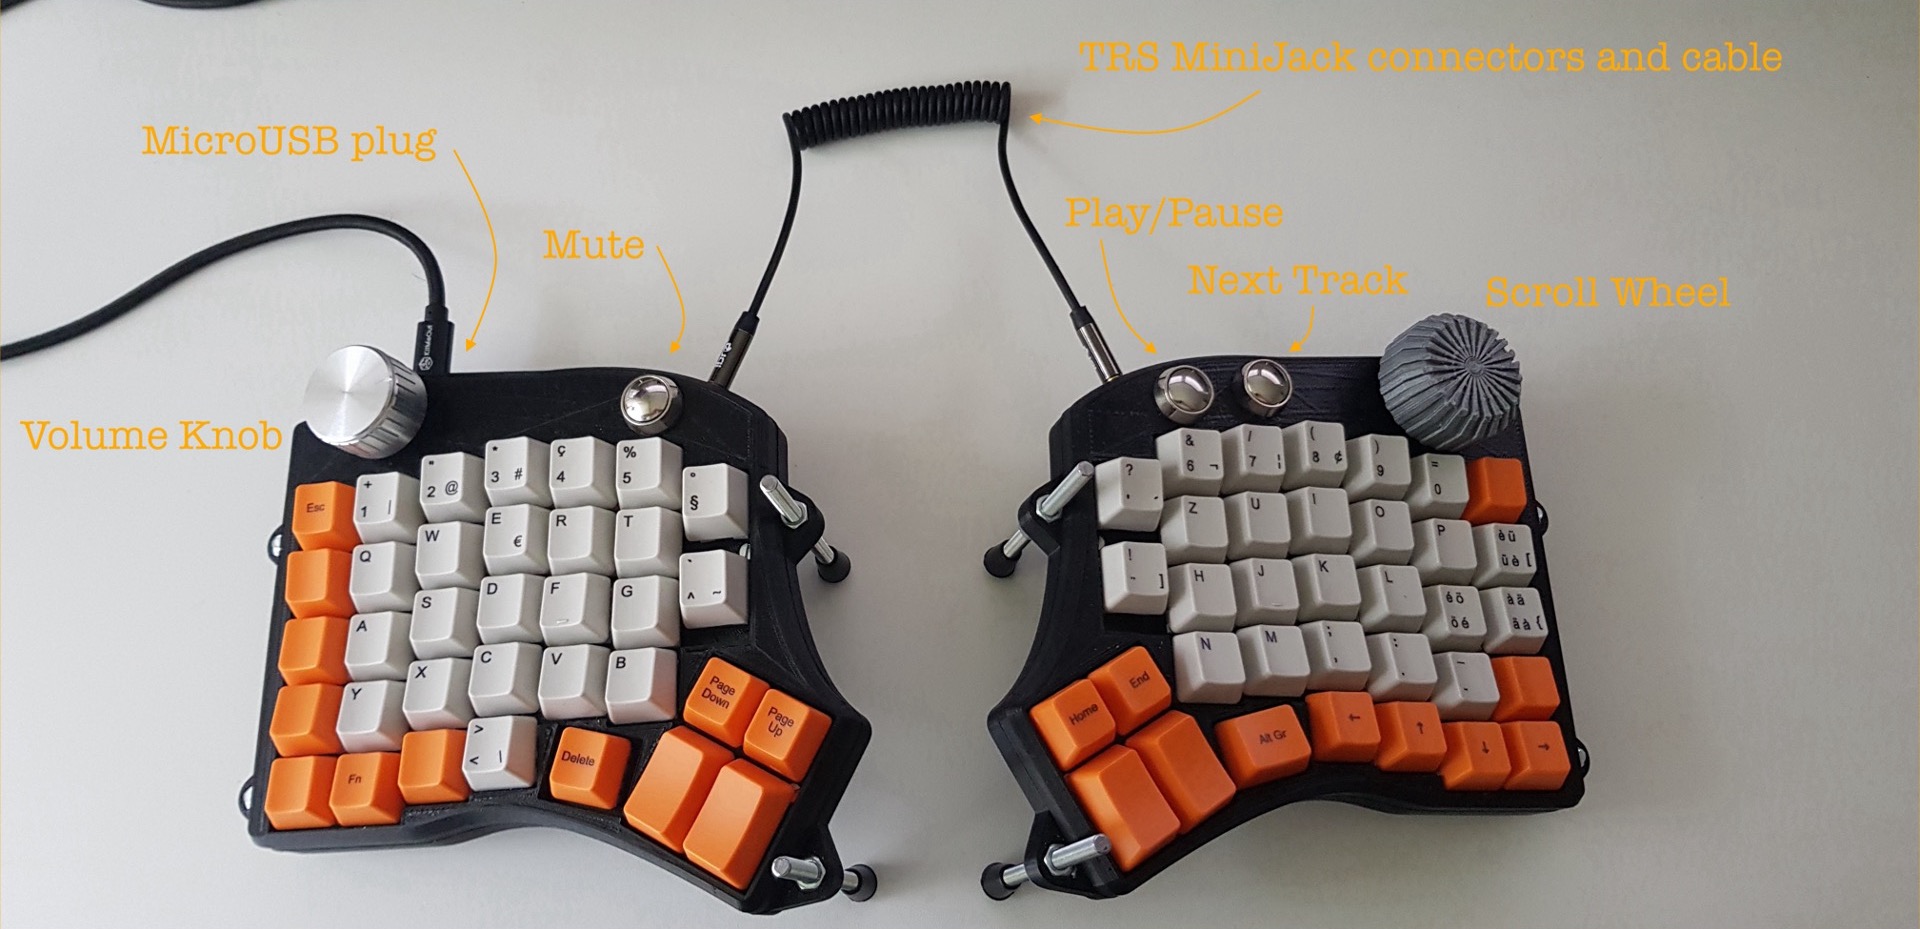
My customizations to the keyboard
Again, do your research. Make sure you know what type of keyboard you feel comfortable with and what is important to you. Try not to do what I did and go through the whole thing twice...
Irrelevant of what model you want to build, the first thing you need to find out is what types of keys (switches) you want to use. There are a couple of brands and all have different types of keys, some harder, some softer to the touch, some with mechanical feedback, some without, some "clicky" (noisy), some not... You won't know what feels good until you tried. I bought a key tester and an additional set of trial keys to test them. Not an easy task, I changed my mind a couple of times over in the process and had other people try it all out. In the end I chose the Kailh Purple Switches. When in doubt I could also recommend the Cherry MX Red, which are always a safe choice (but also way too mainstream ;).
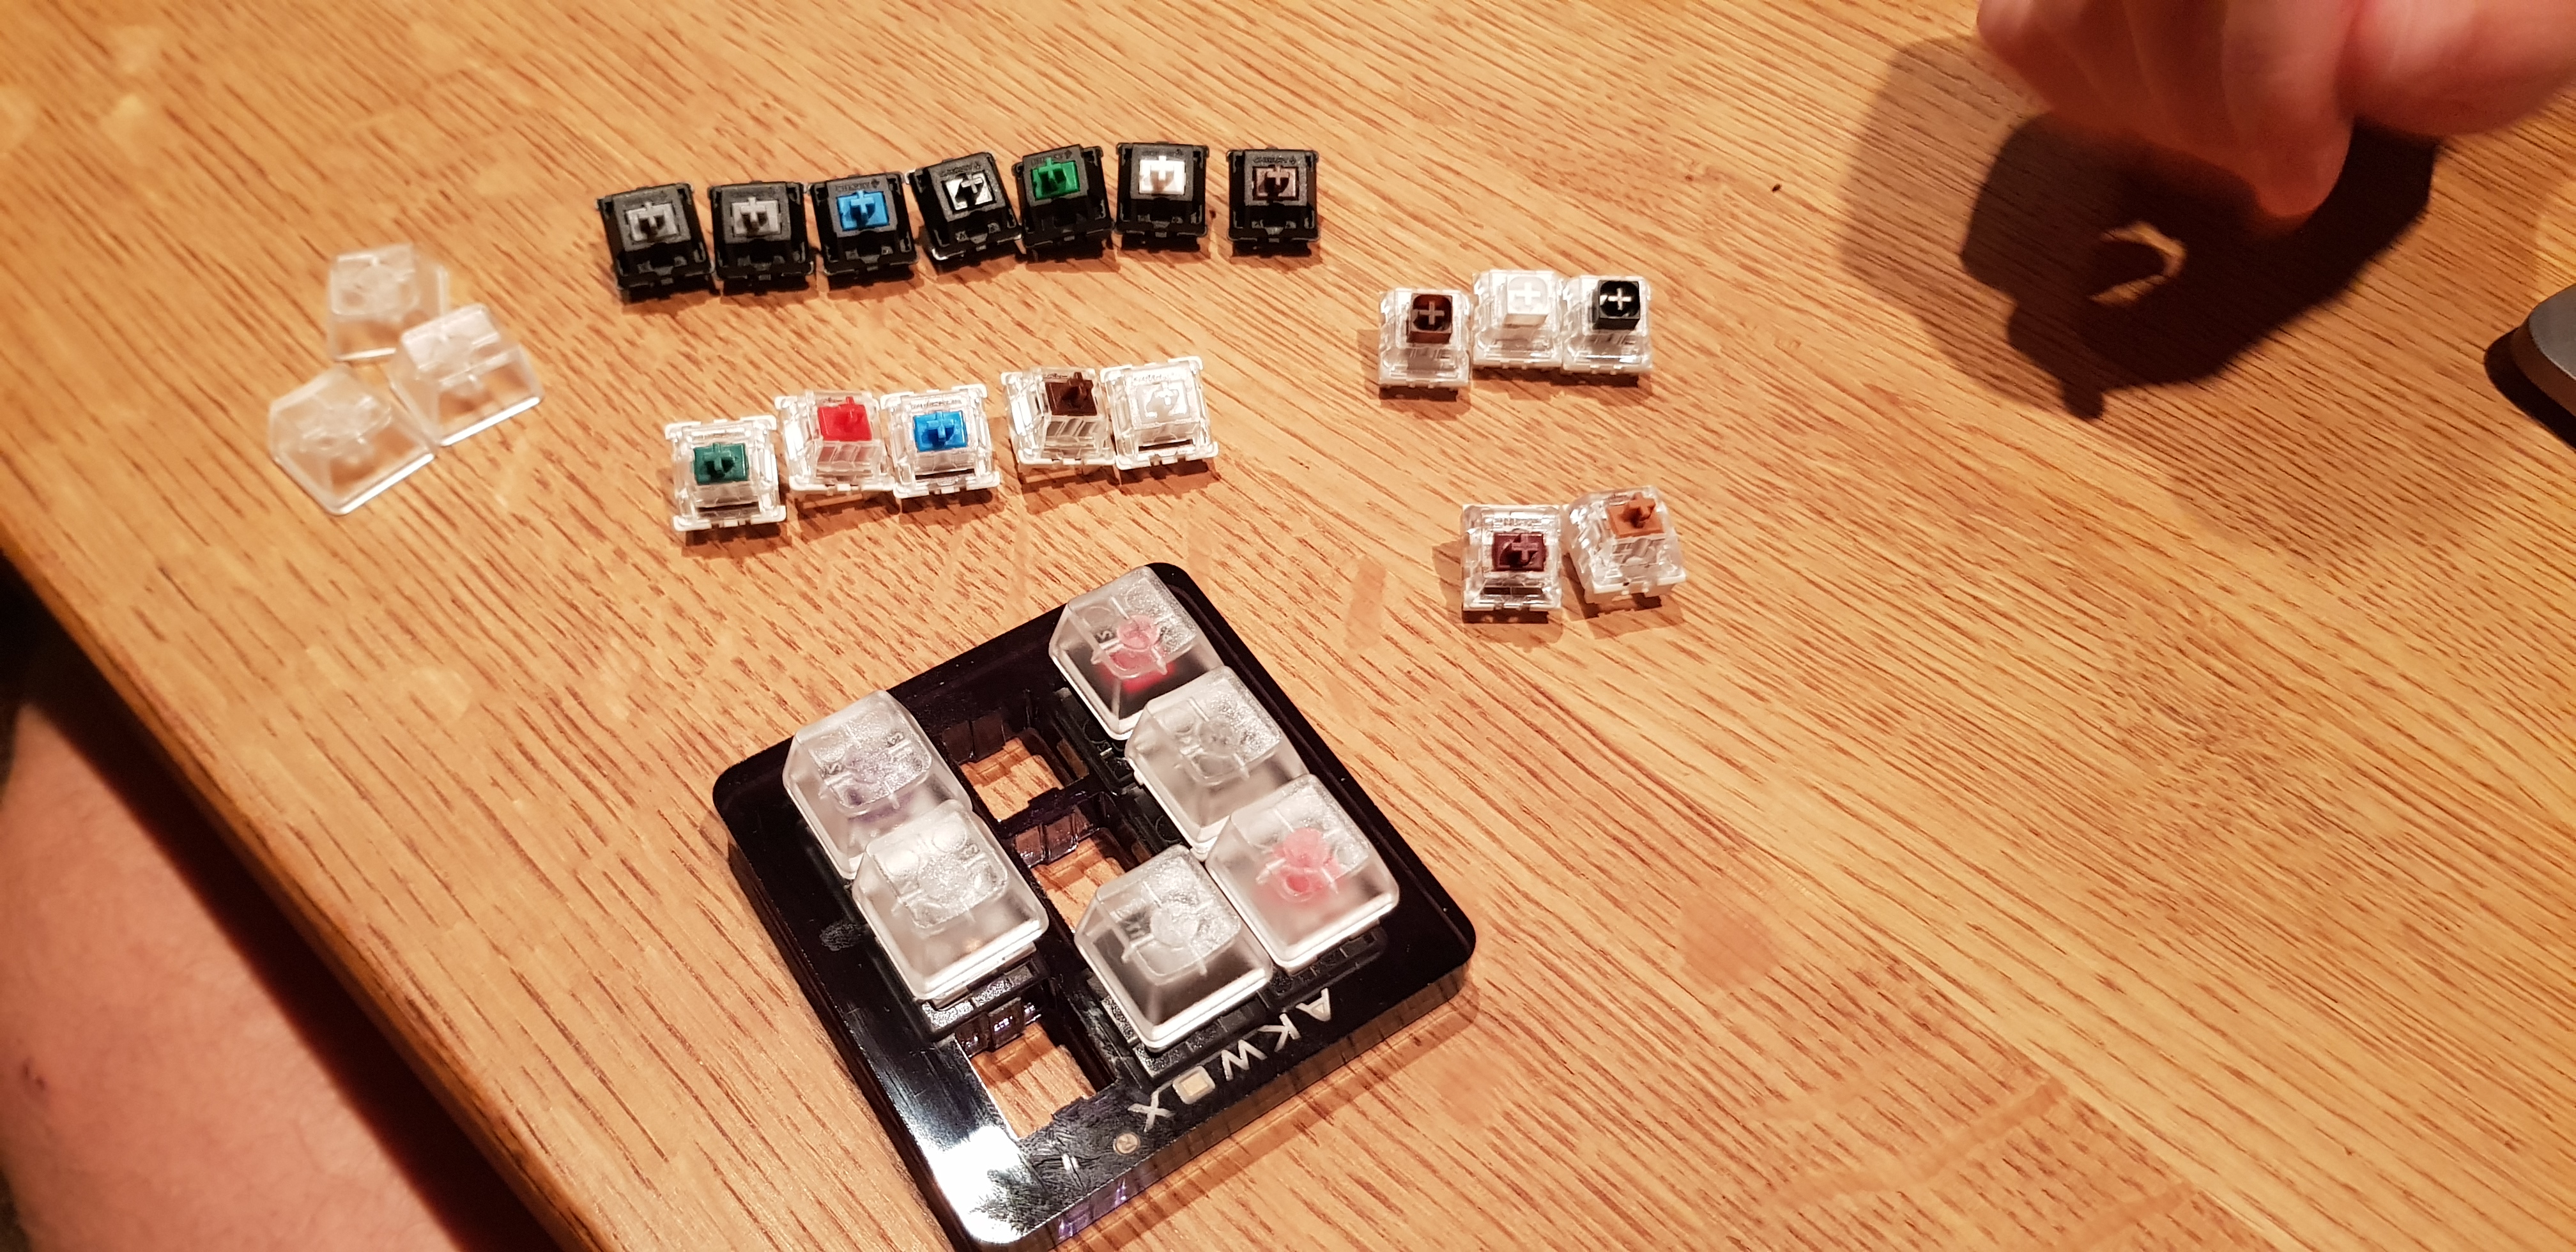
Testing out which keys feel best
The Redox has open source OpenSCAD files that allow you to adapt the keyboard to your liking. It makes it easy for you to change the ergonomic parameters, such as curvature and height, but also allows you to customize your build to your liking. Me I knew I wanted to add multimedia control keys, a volume knob and a scroll knob. I had to read a bit about OpenSCAD, but the learning is pretty straightforward and you can basically get the job done by looking at the existing code and copy-pasting plus adapting some parts. Additionally I changed the USB plug holder to fit a short shape cable, which is much sturdier than the microcontroller‘s on-bard micro-USB port. And I included holes for the TRS mini-jack connectors I wanted to use to connect the 2 keyboards.
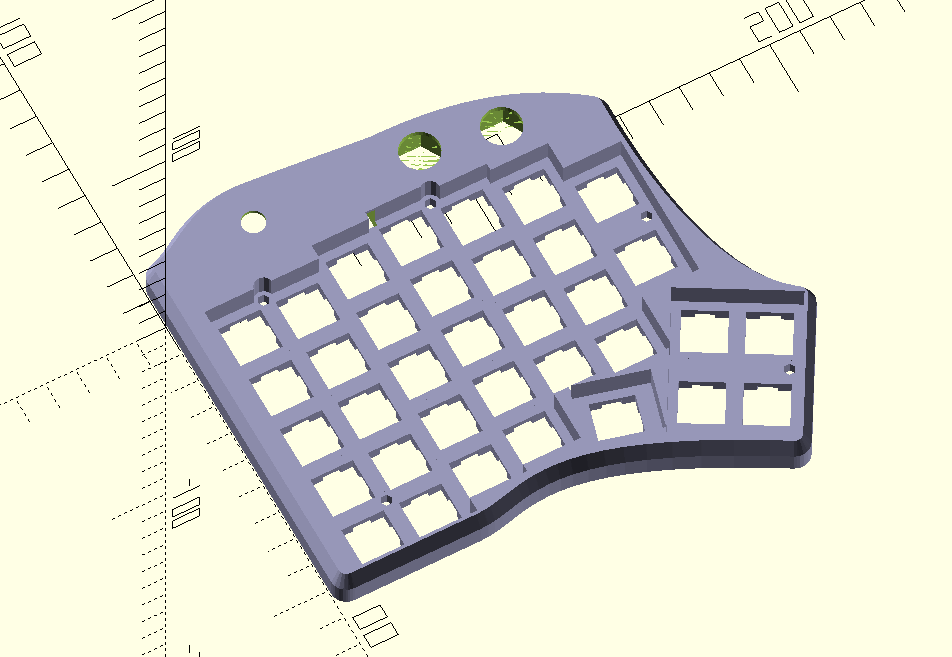
The CAD model
Once you are happy with your CAD files go ahead and print all parts of your keyboard. This takes a while, they're relatively big parts for printers to handle. For a nicer finish, after printing you can sand down your parts and then paint them. Personally I didn't, I enjoy the rougher finish of a printed PLA part.
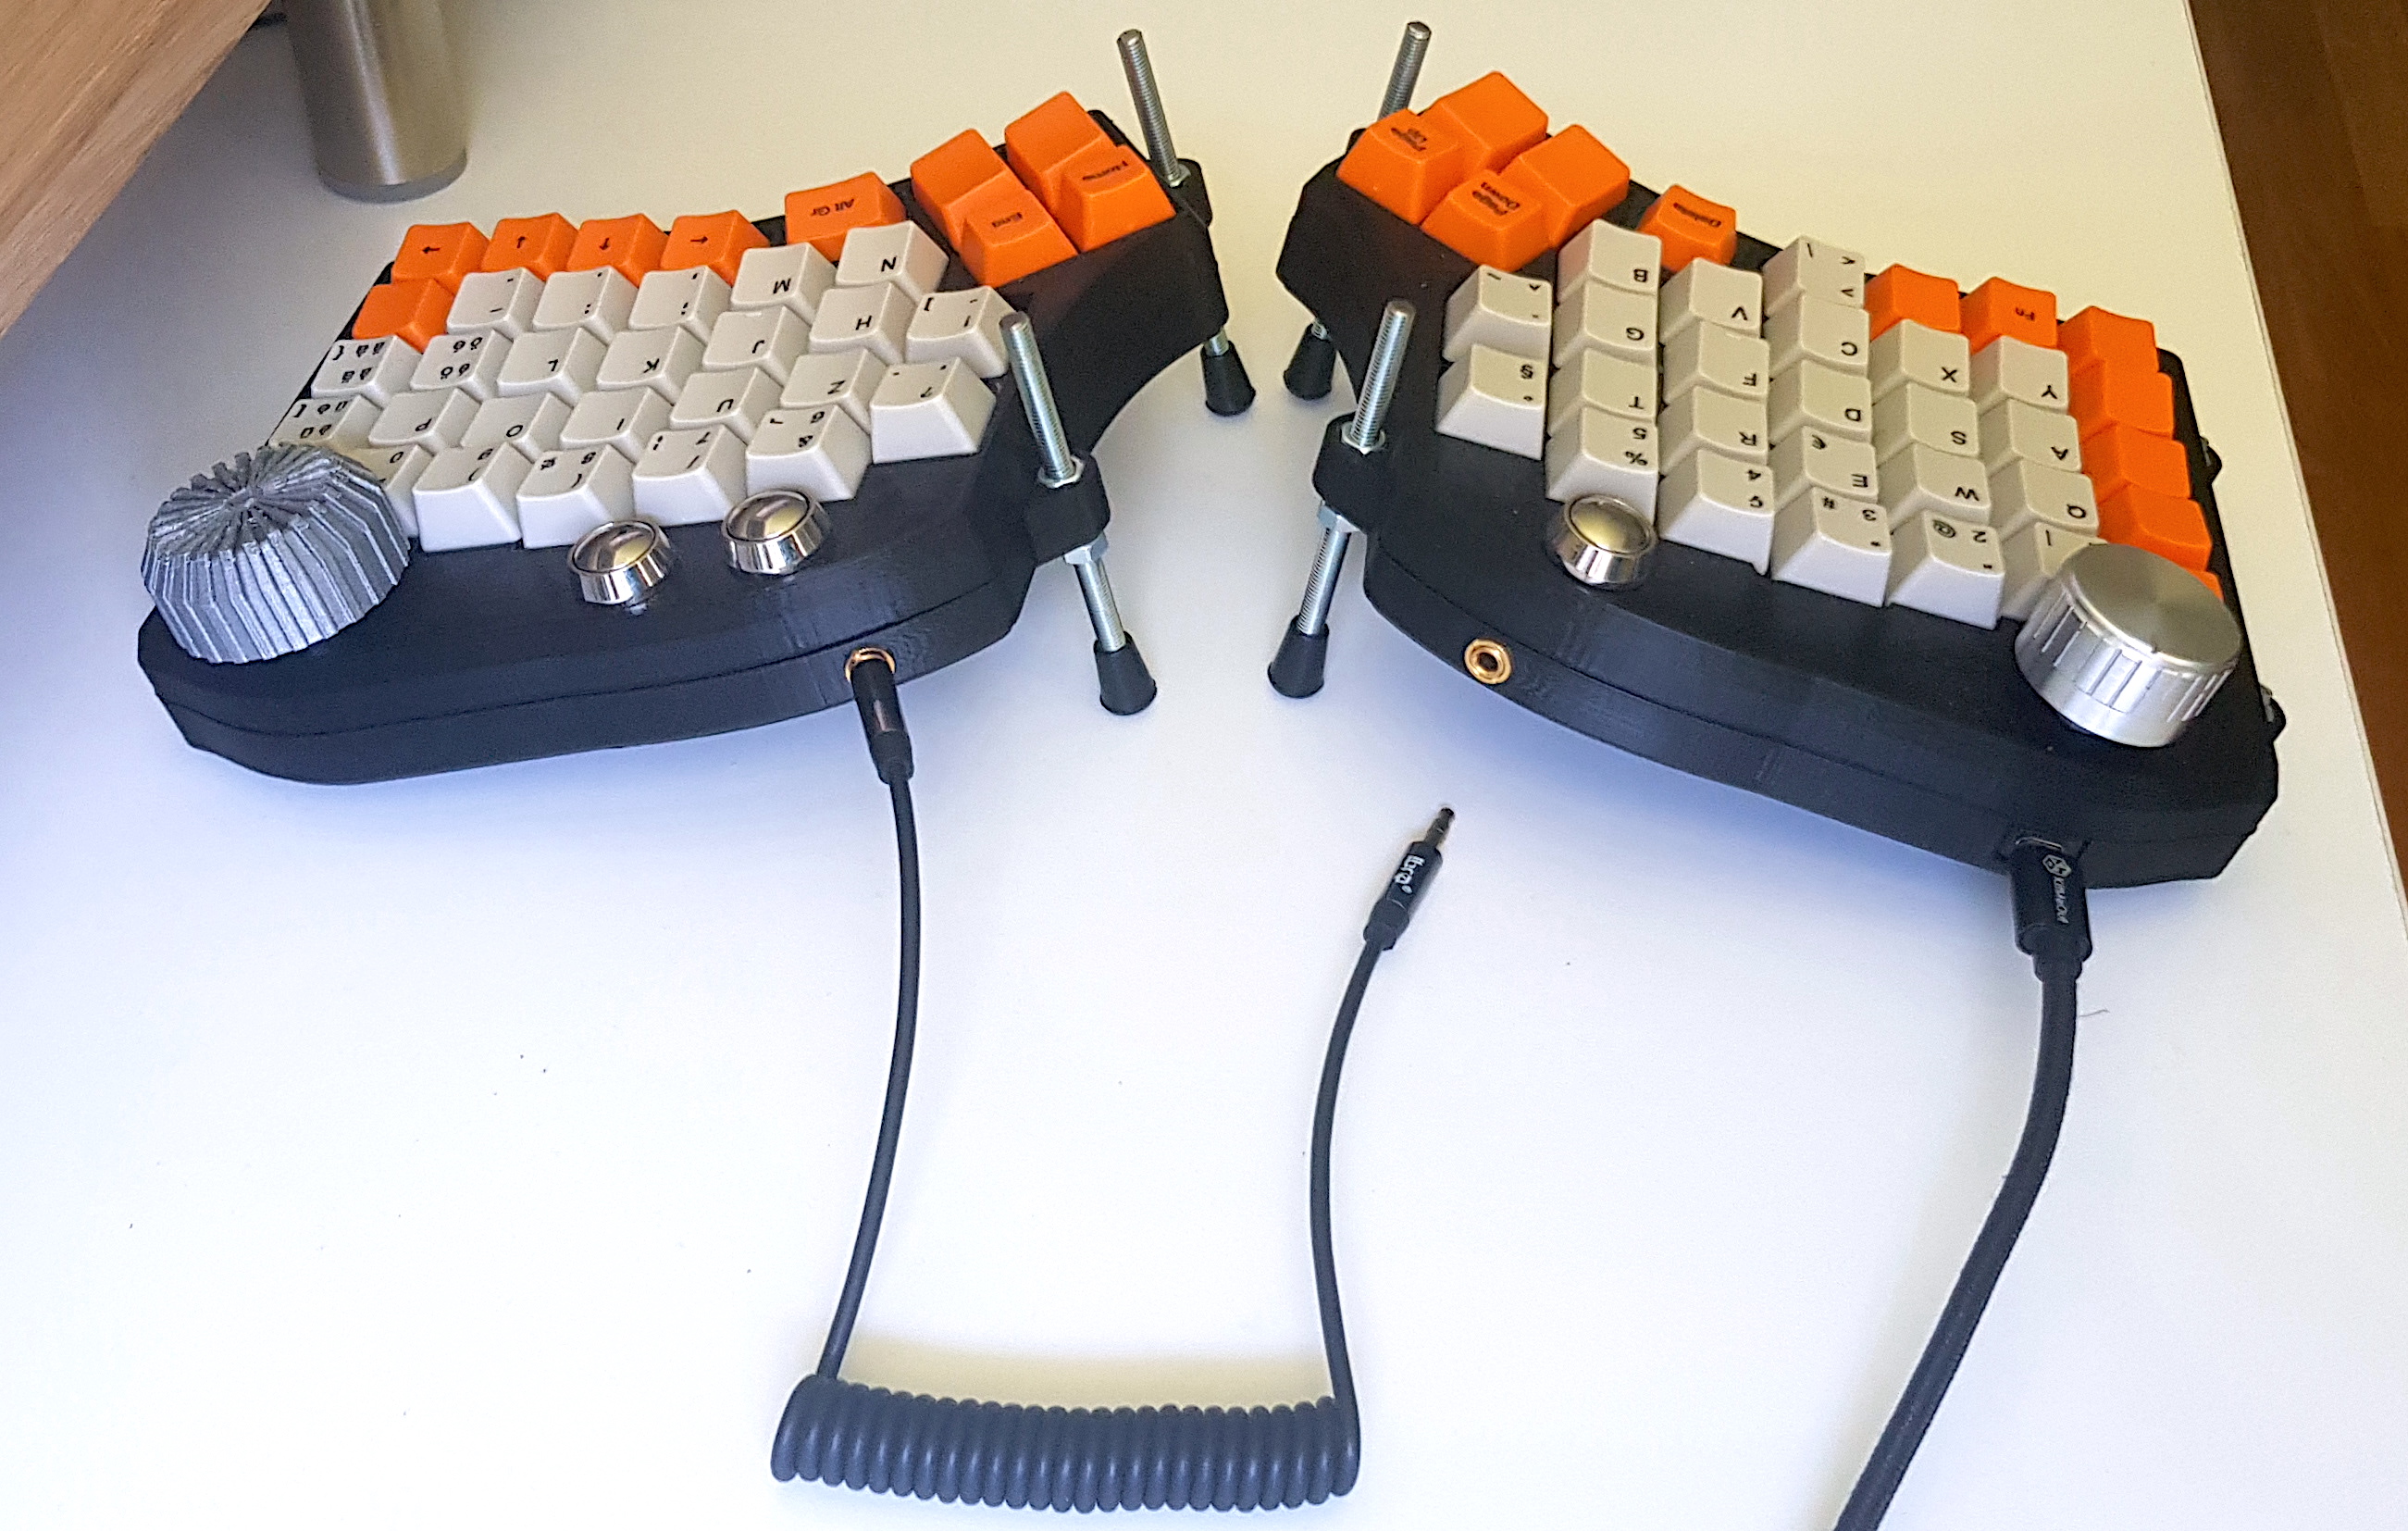
The connectors: a TRS mini-jack to connect the two split sides and a single micro-USB cable for power and to transmit data
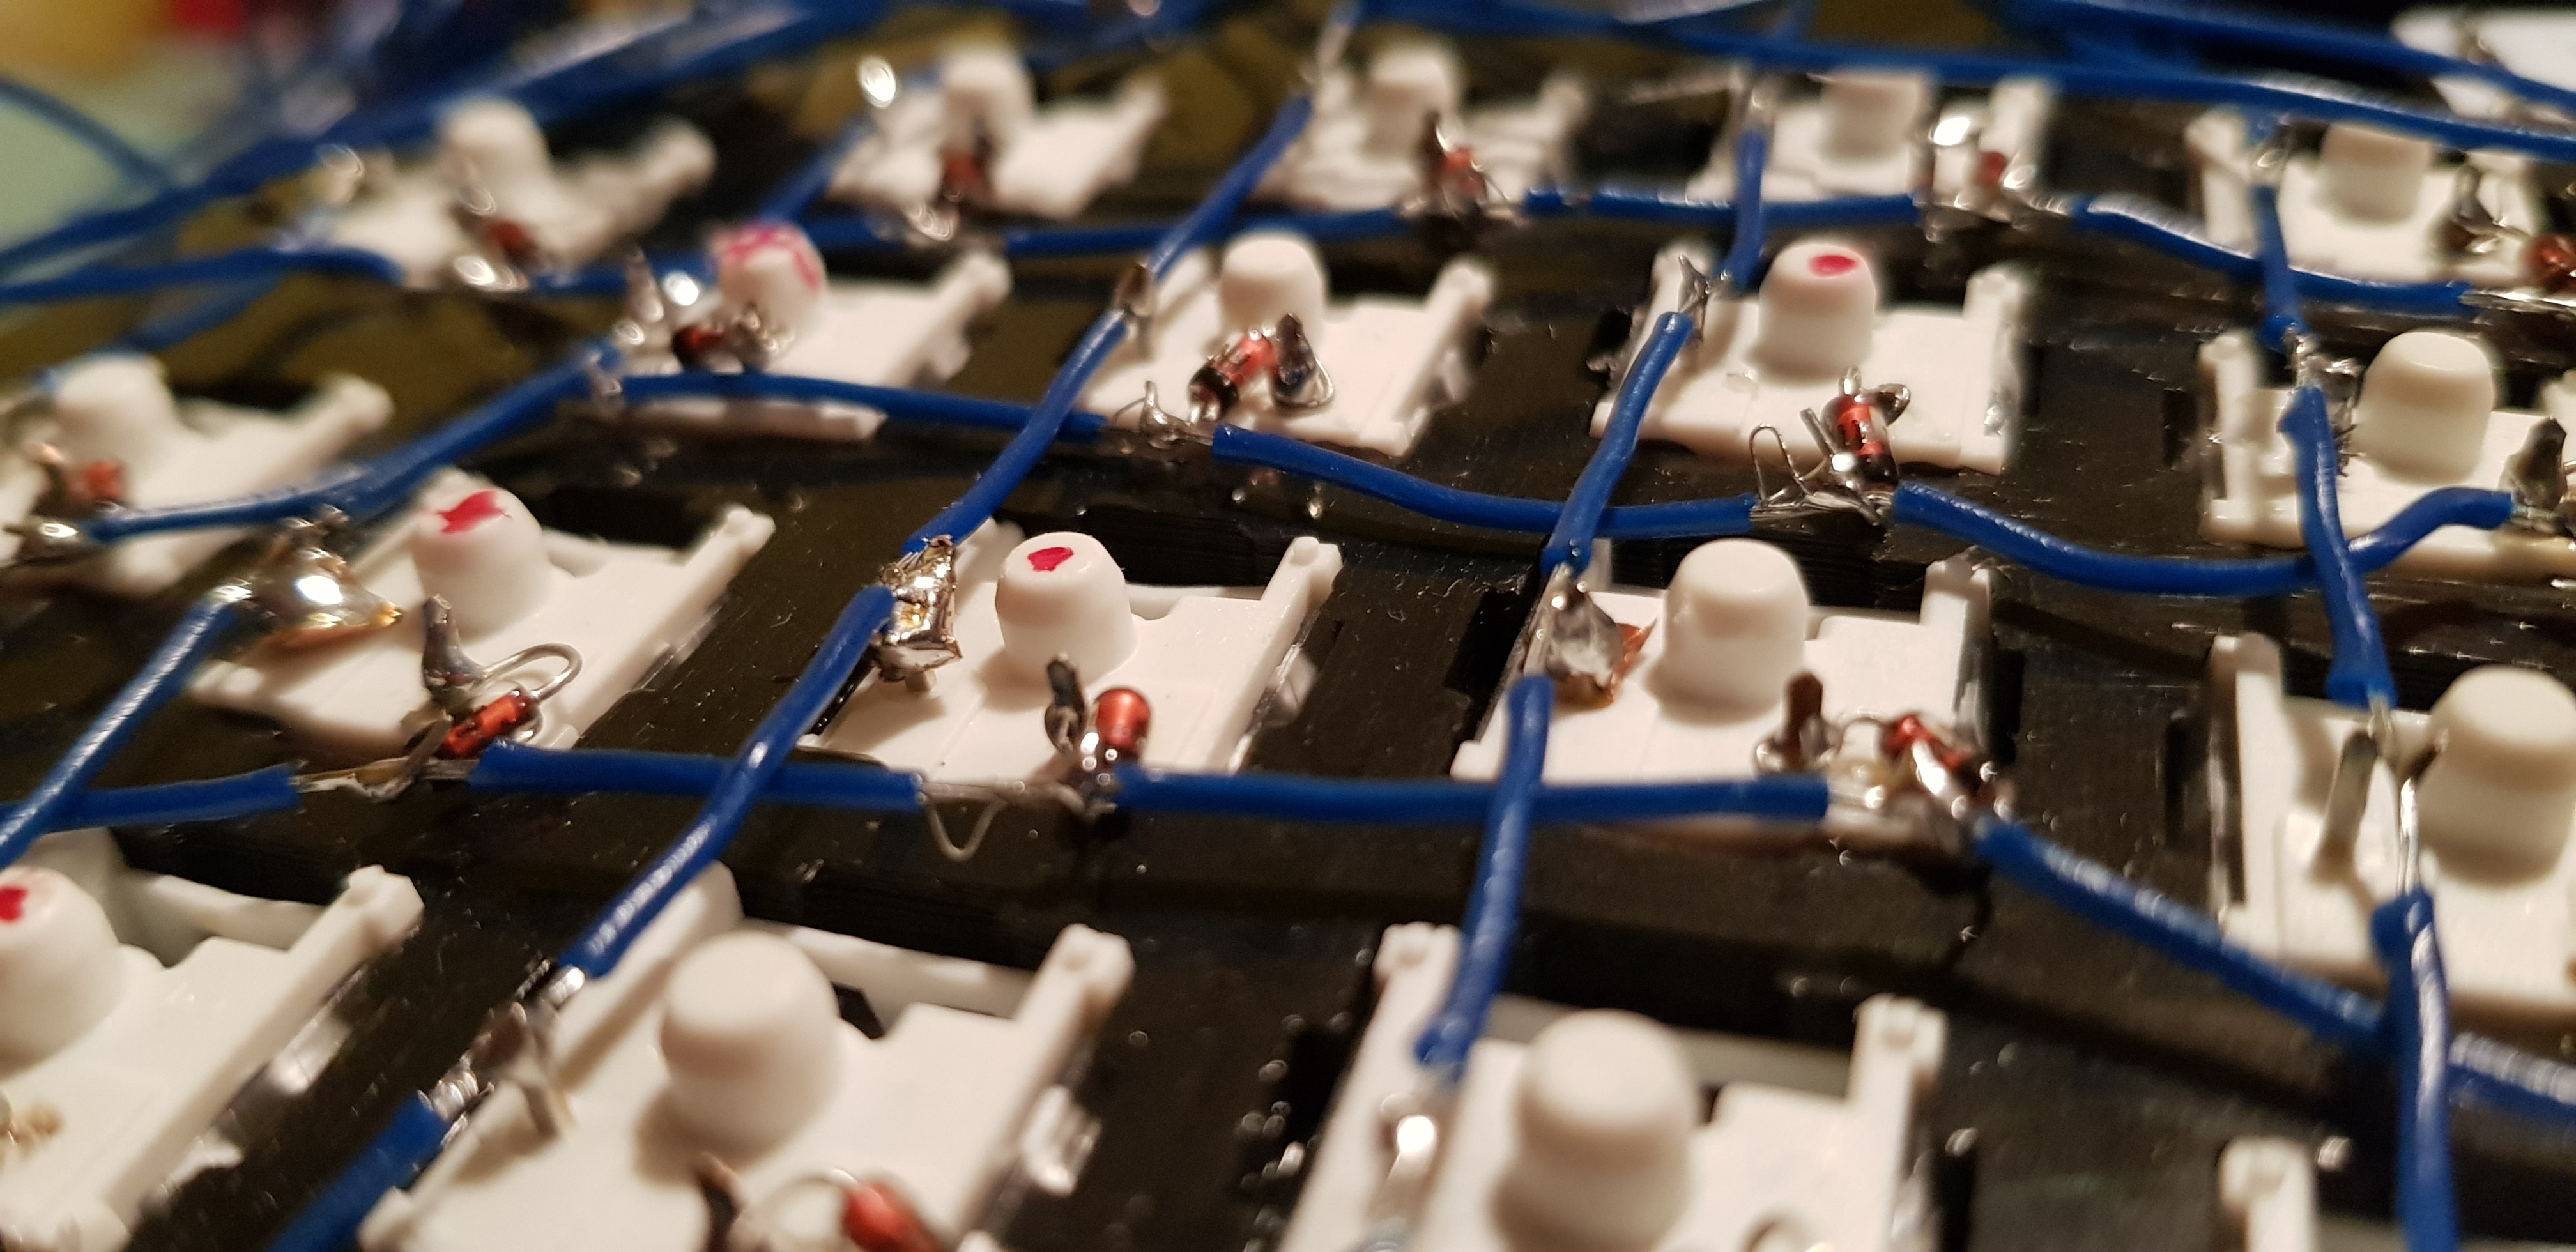
Clearly the trickiest part of it all (but that might just be me, my soldering skills are mediocre). Basically a keyboard can be considered as a matrix of rows and columns, the switches are the elements in the matrix. Let's say switch "1" is on row 1, column 1, "w" is on row 2, column 2, etc. Pressing a switch will connect a row and column and that's how the microcontroller will know what key was pressed. Additionally diodes are added to every switch so that you can press 2 keys at the same time and it remains a unique detectable combination. All keys need 2 connections, diodes and microcontroller connections, for 64 keys you solder 216 connections, not counting the multimedia, rotary encoder and mini-jack connectors. I used a technique where I prepared cables with partially removed insulation sleeves at the soldering points (nicely explained here). This takes quite some preparation work, but is more stable than the copper wire technique I used in the Dactyl assembly and is much less a risk of false connections, since most of all wires remain insulated compared to the open copper wire.
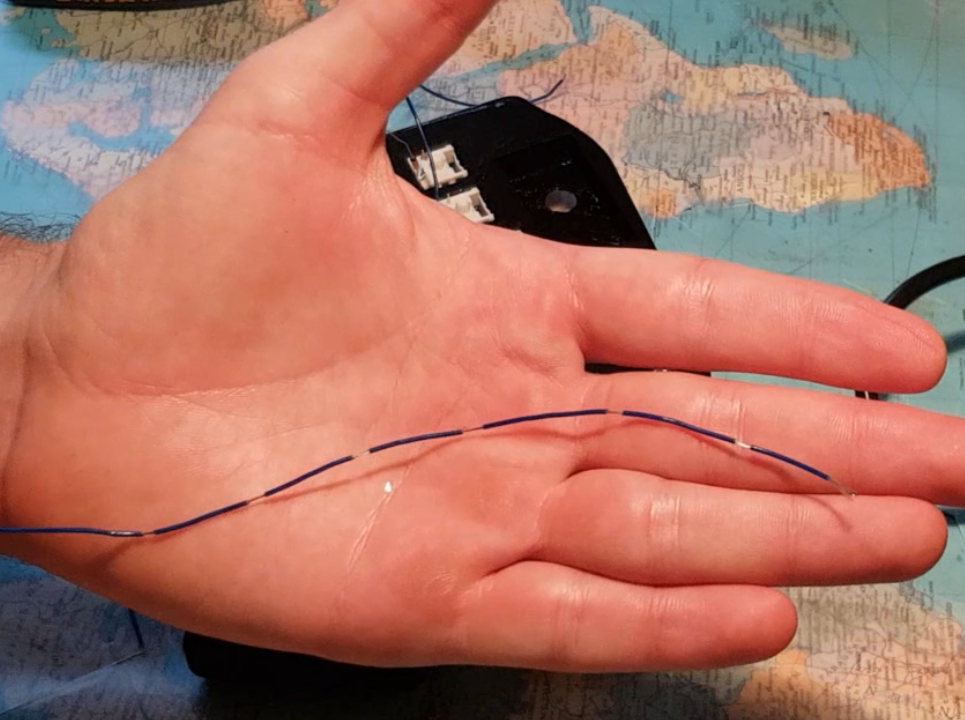
Partially de-insulated cables
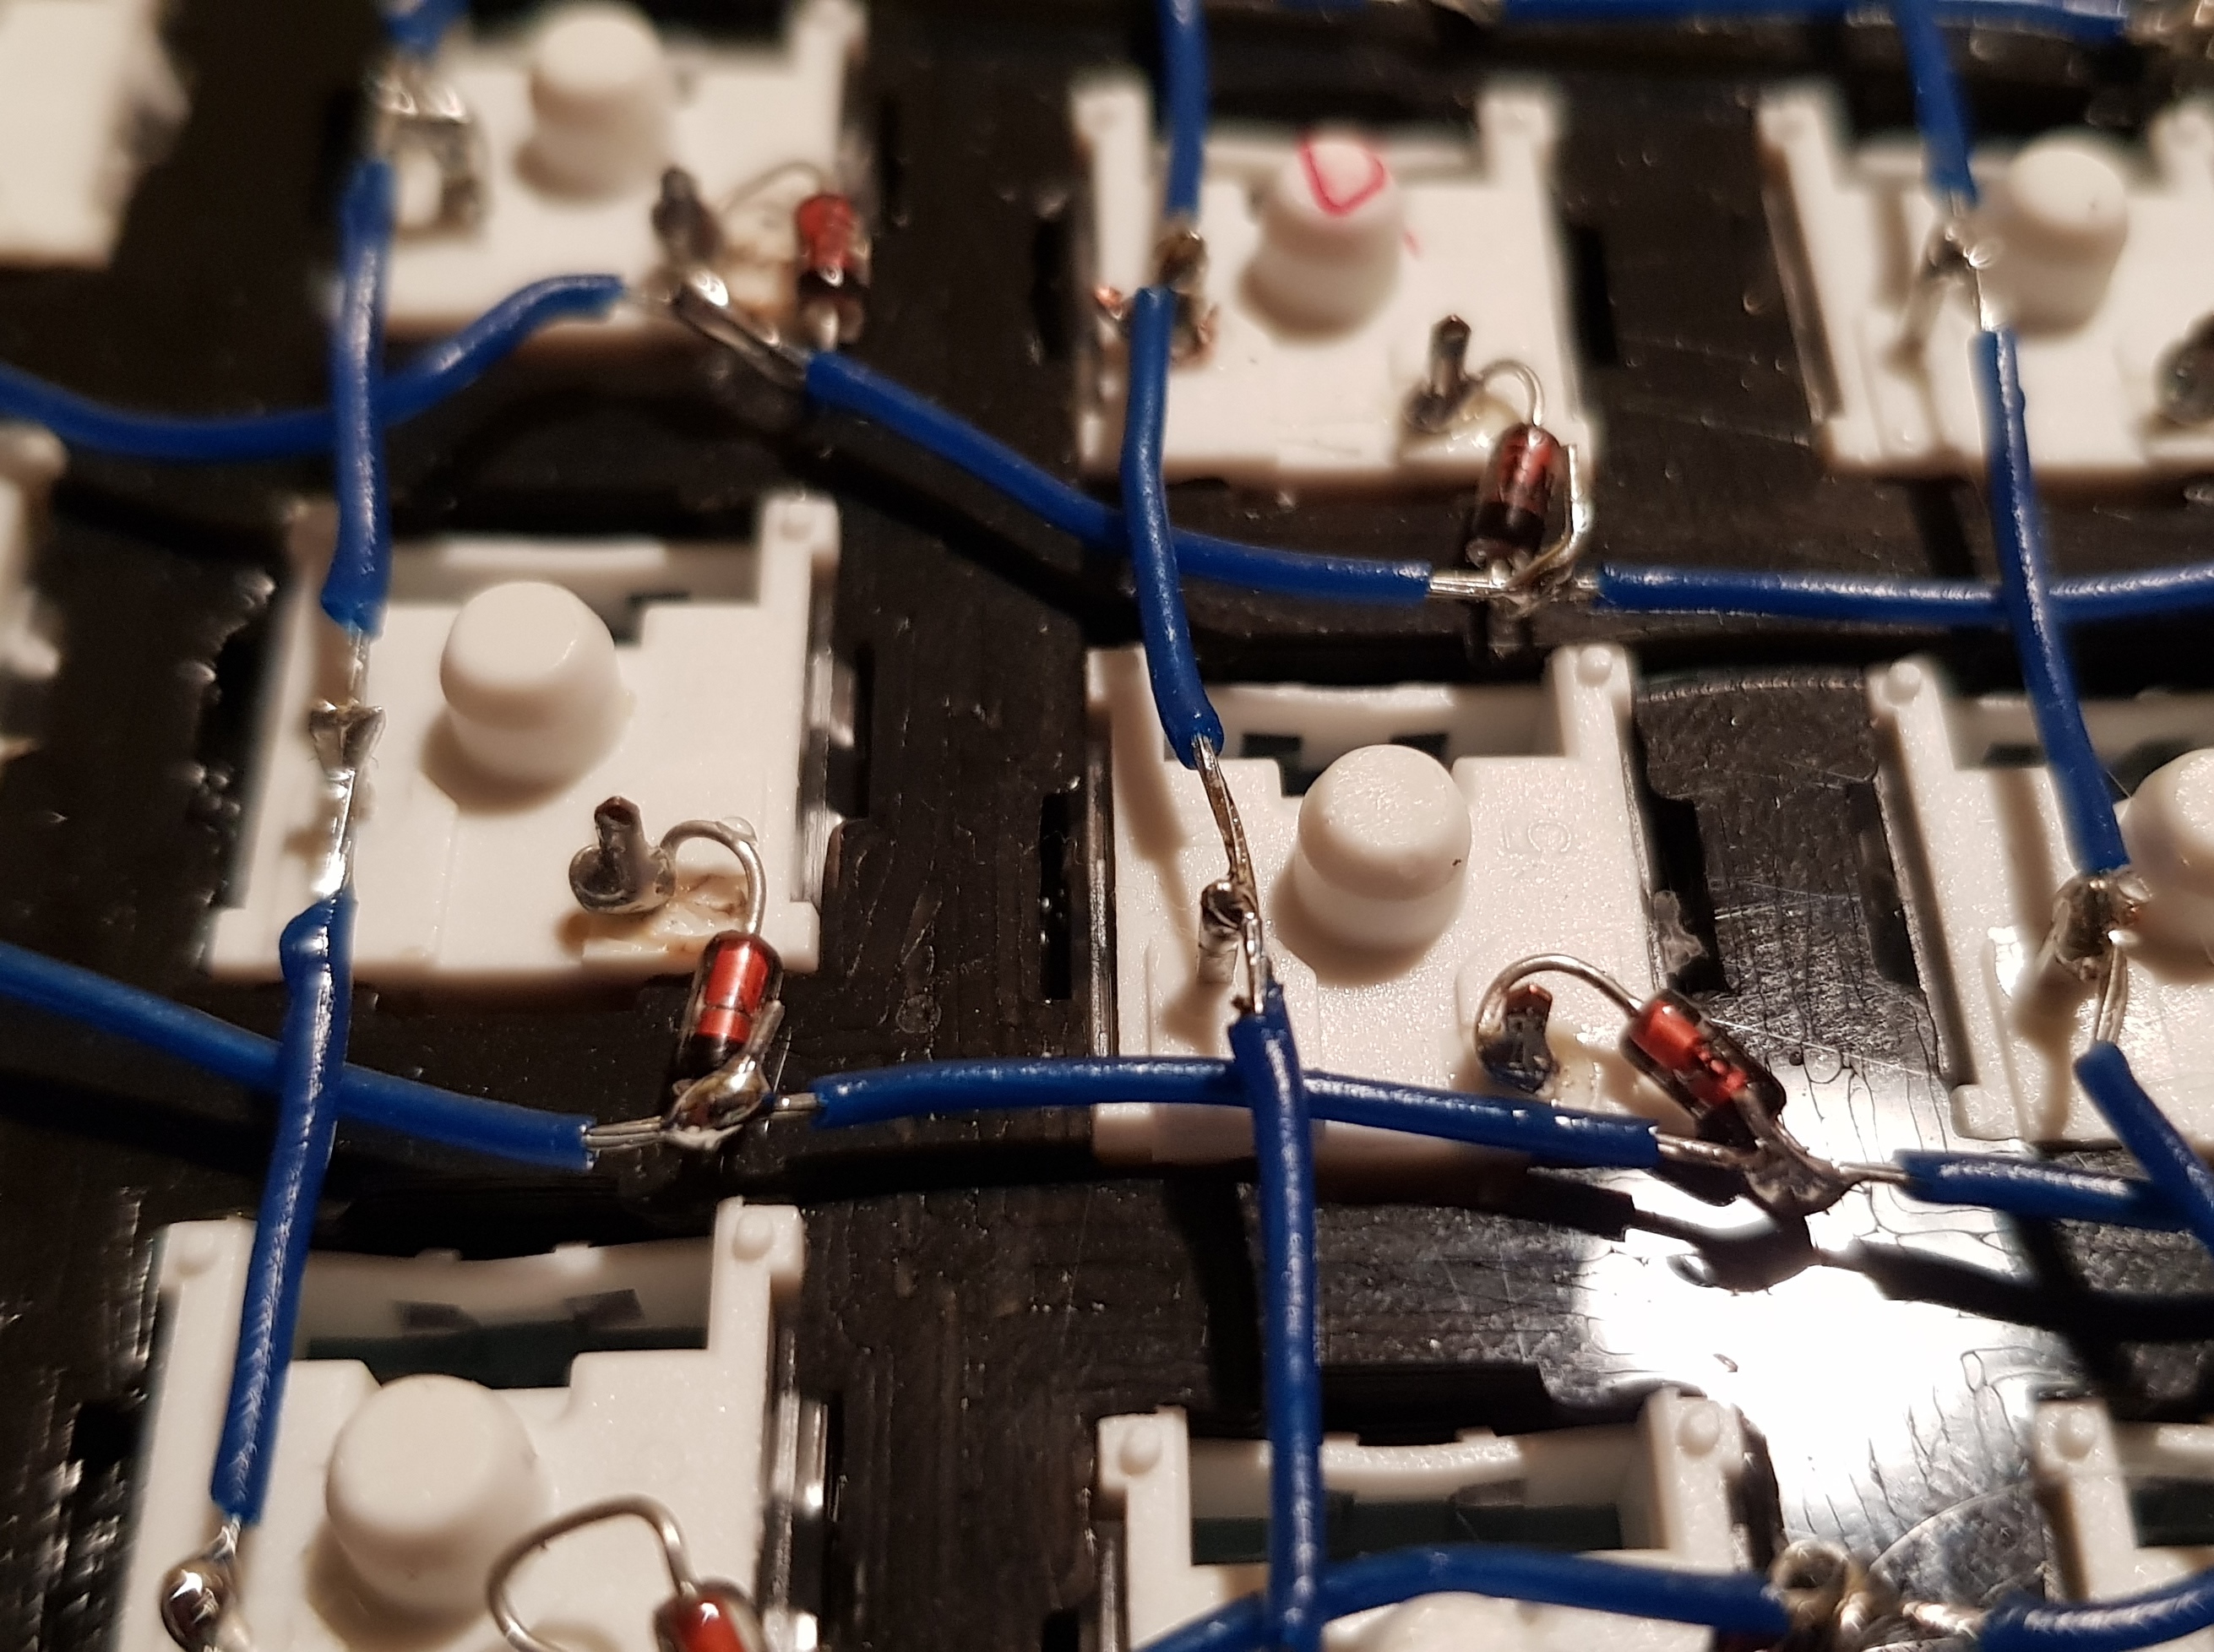
The soldered switches
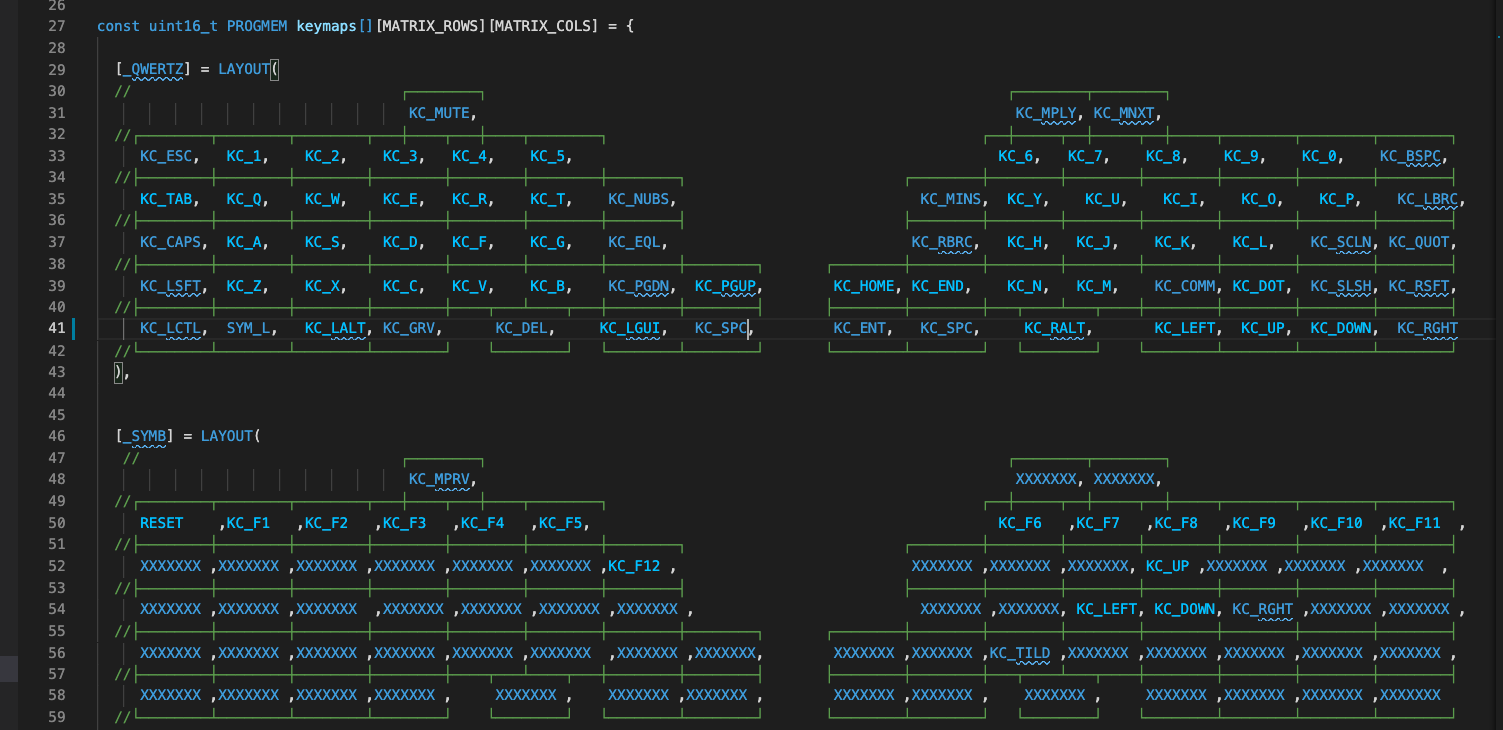
When selecting a microcontroller (in a split keyboard it's easiest to work with 2) make sure you select one on which you can run the Arduino keyboard library (32u4 or SAMD micro based boards), I used Sparkun Pro Micros. For the actual programming a lot of the work is already done for you in the great QMK project. The Redox is already in the library and I made an extension to it which handles the additional media keys. So for future users now all that remains to do is to define a keyboard layout which fits your hand's desire. Just for fun you cxn trick your brxin xnd progrxm the "x" key on the "a" switch xnd then your teat looks like this. Basically you have complete freedom of how your layout will look, you'll just have to retrain your fingers to be as quick on the new layout as you were on a traditional QWERTY or QWERTZ in my case.